Video is leading the way when it comes to content creation. It’s becoming more and more popular on social media and websites alike, as an easy way for users to absorb information or learn new things.
Video has also been shown to boost conversions. Videos of products, for example, can make viewers up to 85% more likely to buy because they will have a better understanding of what the product does and how well it works. Video can also show multiple angles of a product and give consumers an idea of size, and even quality.
While traditional video is helpful when selling tangible products, screencasts (recordings of your computer screen) are particularly useful when you’d like to create a video of a work process or program tutorial. They can also be used for demonstrations of a sign-up process or to show viewers how an online service works in a step-by-step manner.
And, thanks to Screencast-O-Matic, screencasts have never been easier to create.
Screencast-O-Matic is free and easy-to-use software that allows you to take 15-minute screencasts, which you can then save as a video or publish on YouTube. The Pro version, which is only $15 per year, allows longer recording times and the ability to publish on Google Drive, Vimeo, or Dropbox as well.
You can also host your video at Screencast-O-Matic and, if you run a business or school, there are team options as well, which include some of the higher-tier features.
Is Automation Agency the right fit for you? Take this quick quiz to find out!
How to Use Screencast-O-Matic
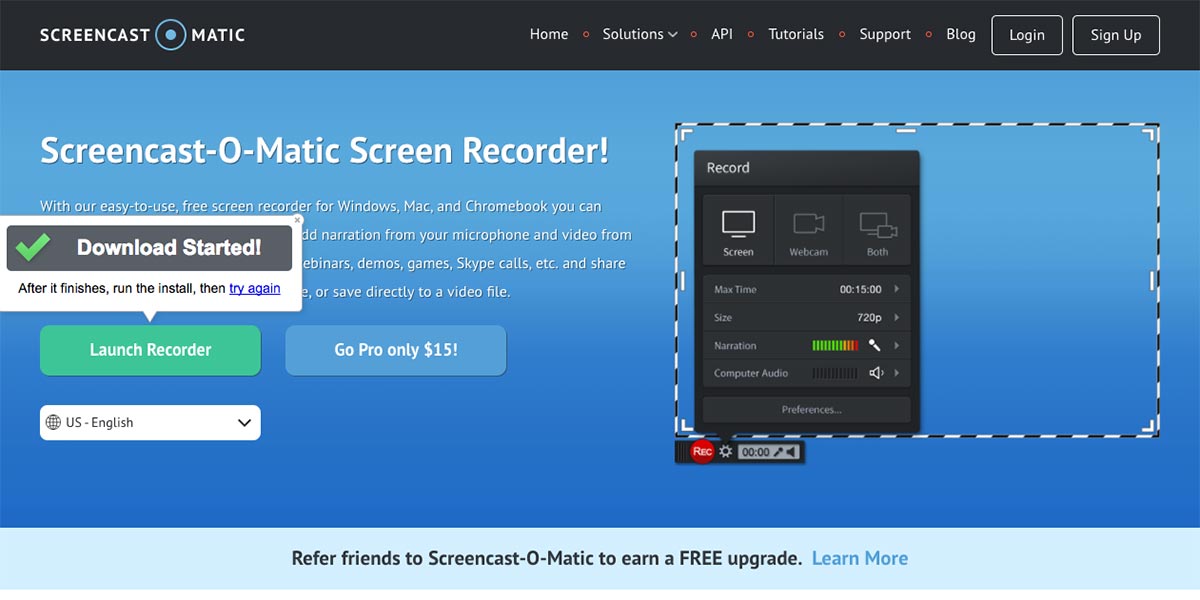
Using Screencast-O-Matic is very easy, and the interface is simple and intuitive. The first thing you’ll need to do is download the Screen Recorder Launcher from the Screencast-O-Matic website.
When you first click on “Launch Recorder” on the screen recorder page, you’ll be prompted to download the app. That will allow the website to use the Screen Recorder Launcher app in order to take screencasts, gain access to your microphone, and upload the video once complete.
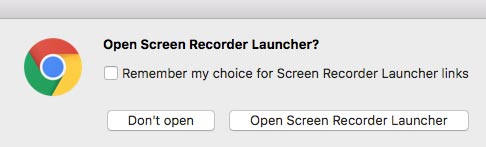
Once installed, head back to the website to start recording. Click on “Launch Recorder” again and select “Open Screen Recorder Launcher” when prompted.
That will launch the screen recorder and its controls.
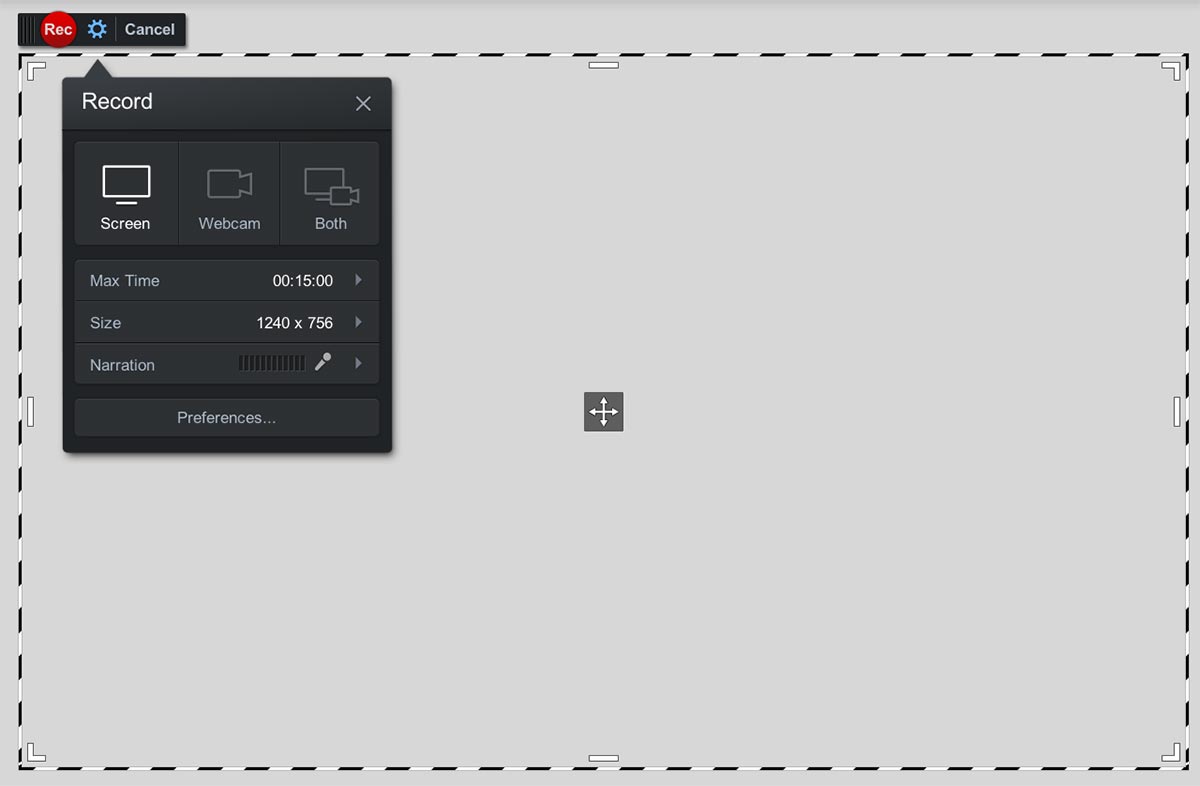
You’ll see a frame appear on your screen with a small widget in the corner. This frame represents everything that the recorder will capture when you hit record. You’ll also be able to record narration with your built-in microphone if you wish.
The widget will give you some preferences to choose from as well. You can record your screen, your webcam, or even both. You can also adjust the frame size by pixel dimensions, or you can simply drag the corners of the frame and put them around whatever you want to record. The control in the middle allows you to position the frame without resizing it.
In order to start recording, simply hit the red record button, and everything you do within the frame (and say, if your microphone is active) will be recorded.
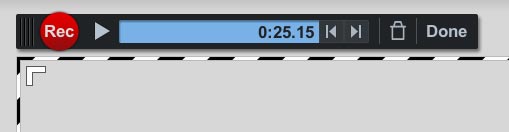
Once you are done recording, you can push the pause button and the widget will change, showing you the time you have recorded so far and giving you options to either save, delete, or resume your recording.
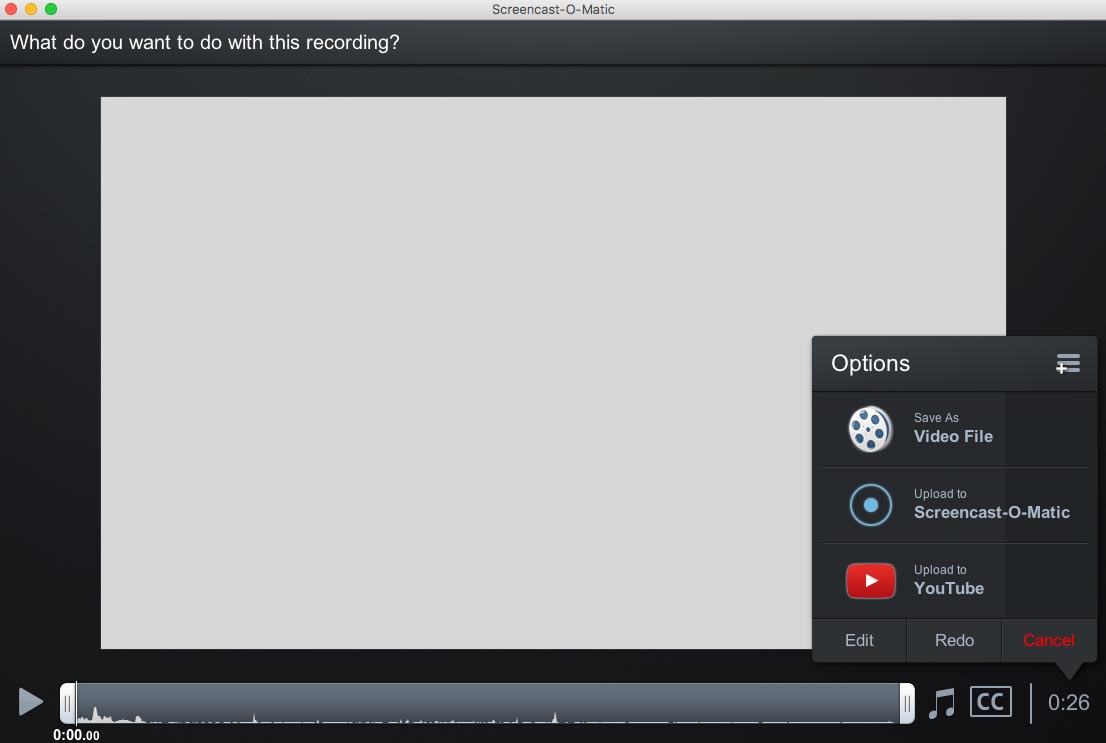
When you select “Done” on the widget, a new window will open and you’ll be able to see a preview of your recording. In the same window, you’ll have the option to save the recording as a video file or upload it to YouTube or Screencast-O-Matic. With a Pro account, there will be more options here.
Uploading Your Videos
Once you’re happy with your video, you can select to upload it online. The easiest way to do this, is to upload to YouTube, after which you can embed the video on any other website, including your own. Select the “Upload to YouTube” option after you are done recording, and then click on “Launch web browser”.
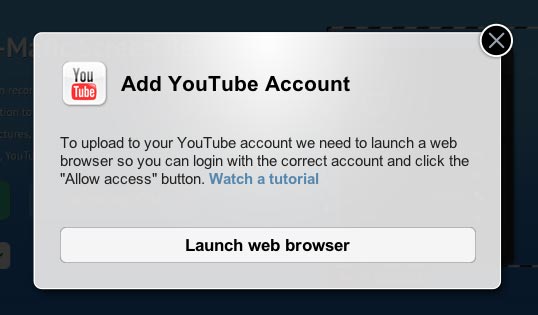
You will need to log into your YouTube account and grant Screencast-O-Matic access. Once access has been granted, Screencast-O-Matic will give you some upload options for your new video, such as a title, description, category, tags, and whether or not to add captions.
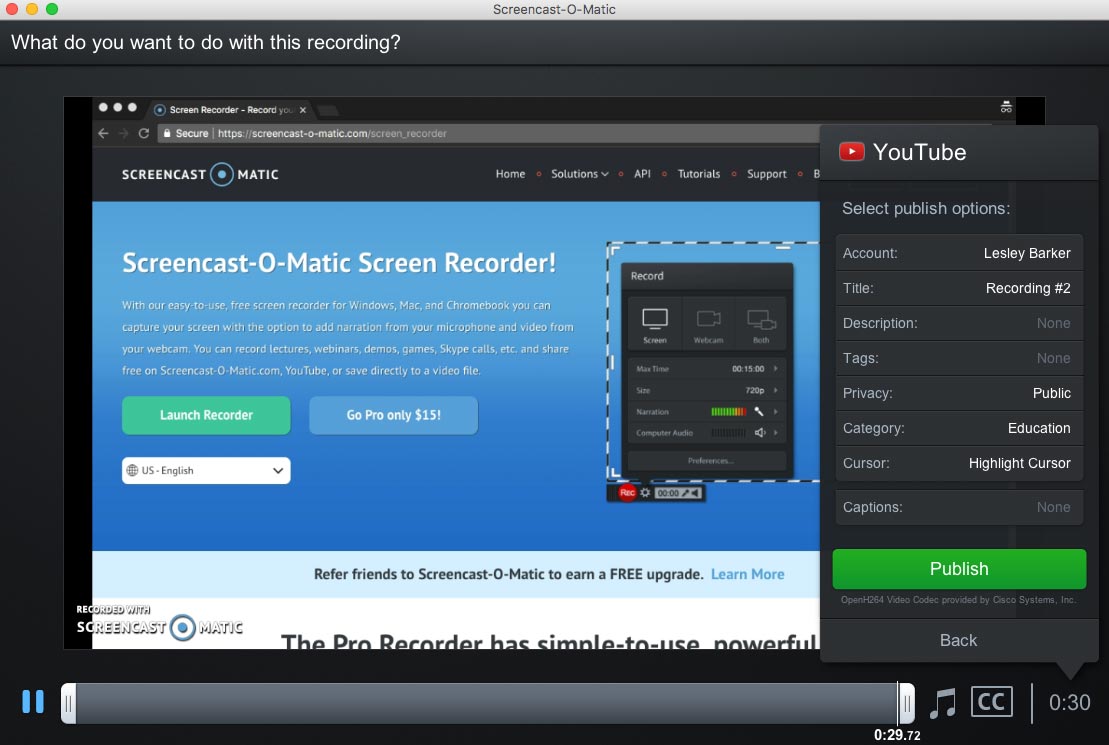
Once you are happy, click on “Publish”, and your recording will be converted and uploaded to YouTube. Depending on the length, this might take some time.
Adding Your Video to Your WordPress Website
The easiest way to add the video to your website is to copy the embed code from YouTube and add it to the page you want the video to appear on. To get the code, go to your video on YouTube and click on the share button.
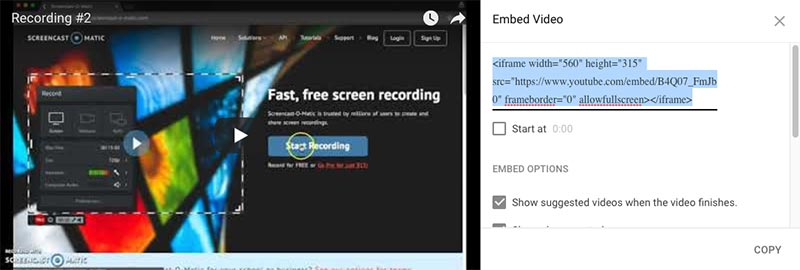
You’ll see an option for embedding, which will give you the code you need to add the video to your site. Copy the code, and then paste it onto the relevant page as part of the HTML code and not the WYSIWYG editor.
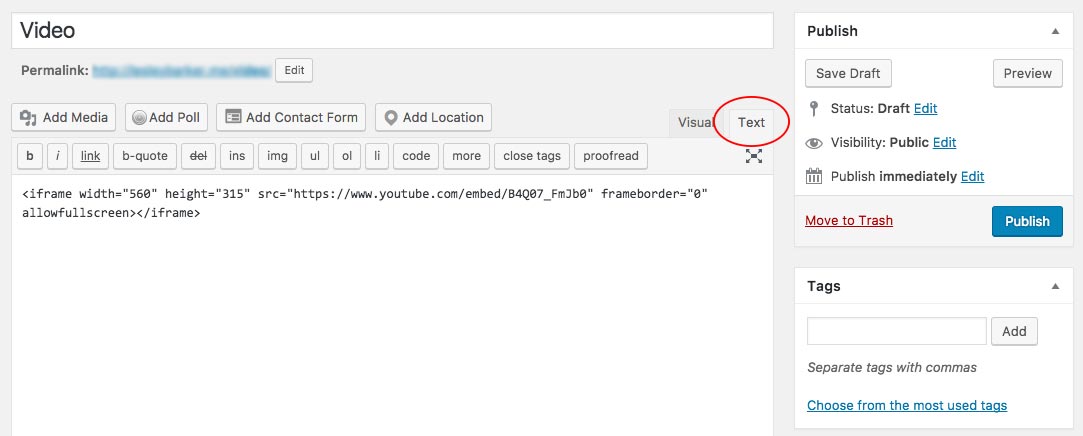
The video will now appear and be playable on your web page without the viewer having to go to YouTube.
How Automation Agency Can Help
Getting a little stuck with adding videos to your website? We’re experts at adding media to WordPress websites. Find out if we’re right for you today.
